Just a little toot here.
First of all you need to find the right superglue. Right meaning cheap and runny as hell. Mine was the consistency of water. Found at the pound store. Here is what I used.
Next you need your prepared surface for the sand runnel to be placed. These are rock spires made from foam and coated in guesso. The white is pollyfilla that I used as a filler between the foam spires and the foam hill. Basing for all the flat surfaces was done first to the runnels something to hold onto while they were being set.
Once you are ready you pour sand into the area that will have a runnel. Let the sand flow naturally and then hold at an angle to keep it in place.
Next dribble the superglue onto the surface to lock it in place.
Since it is sand and will flow normally you can add more to the set runnels until you get the effect that you want.
A couple of things to keep in mind. The superglue must be incredibly thin in consistency so it is not glue you would normally use on miniatures since it would run. The next thing is try to drop onto a hard surface first (in this case I used the rock spire) so you do not cause the sand to create craters where the drops of glue hit. If you start from the top you can add drops to the already set sand and move down the slope. Another thing that can happen is small holes in your surface can form (while the superglue is setting) and the loose sand behind the glued surface will pour out. When this happens just let it setup, then add more sand into the hole until filled and re-glue. Last thing to remember is that superglue causes heat when setting up so you do not want to do too much at one time or you can damage materials like foam. I did one runnel at a time and alternated their placement between every other spire so it did not generate too much heat.
Hope that helps.
Snitchy sends.
Total Pageviews
Sunday, July 3, 2016
Monday, June 13, 2016
My Eldar Windrider host.
Hosting photos since I have not posted good shots before. This is everything minus one wave serpent.
Hope you like.
Snitchy sends.
Hope you like.
Snitchy sends.
Wednesday, June 8, 2016
Some more finished pieces.
First off are some forest templates. I wanted to do something a bit different so I went with palms. The bases are from 4Ground and the palms are from Pegasus Hobbies.
Next up is going to be either a captain or a Templar for Frostgrave. Kudos to you if you remember the model. He has been in the lead pile for quite some time.
Hope you like.
Snitchy sends.
Next up is going to be either a captain or a Templar for Frostgrave. Kudos to you if you remember the model. He has been in the lead pile for quite some time.
Hope you like.
Snitchy sends.
Saturday, May 21, 2016
Start of my Frostgrave warband.
Just finished the first three models for my Frostgrave warband. First off is my witch. She is an old Freebooter minatures witch. I am pretty sure that she is no longer available.
Next up is my apprentice. She is a Hasselfree model that I picked up at Salute this year.
Lastly is my treasure hunter. This one is straight out of the plastic box set.
Hope you like.
Snitchy sends.
Next up is my apprentice. She is a Hasselfree model that I picked up at Salute this year.
Lastly is my treasure hunter. This one is straight out of the plastic box set.
Hope you like.
Snitchy sends.
Wednesday, May 4, 2016
Nice finds in The Works
If you are in the UK and have a works nearby check out what they have recently put up.
First is wagon wheels. Here is the pack and a comparison with Sarrisa wagon wheels. There are four of each size so enough for two wagons or some to scatter around.
This is what caught my eye at first. Resin roses. This goes back to a thread on LAF about crops. A few folks have made cabbage fields with roses and I figured I would give it a go. I only bought two pack so it will be a small one.
Lastly is a simple 3/16 inch hand punch. This should work pretty well for panels and such.
Hope that helps.
Snitchy sends.
First is wagon wheels. Here is the pack and a comparison with Sarrisa wagon wheels. There are four of each size so enough for two wagons or some to scatter around.
This is what caught my eye at first. Resin roses. This goes back to a thread on LAF about crops. A few folks have made cabbage fields with roses and I figured I would give it a go. I only bought two pack so it will be a small one.
Lastly is a simple 3/16 inch hand punch. This should work pretty well for panels and such.
Hope that helps.
Snitchy sends.
Monday, May 2, 2016
Clearing my workbench
I spent this weekend clearing my workbench. Not very much for some
folks who seem to be able to produce massive amounts of stuff, but
pretty good for me since I have about sixteen modeling projects on the
go. Kind of my hobby deficit disorder.
First off is some pipeline sections. These are cast from Hirst arts molds and just need some flock/static grass and felting on the base.
Next up is my greenhouse. It is a MDF kit from Warbases and I finished it off with some photo etched plants from GW and 4D. I am pretty happy with it.
Lastly is my campfire. I needed one for my Gypsy campsite and Figured now was a good time to try it out. I used the Ember techniques from the Osprey Masterclass Terrain modeling book. Richard Windrow is the go to source for detailed techniques and if you have not read his books you really should. The fire-pit is just gravel glued to the base and filled on the edges. The fire is small twigs and horsehair and rubber fibers. The glowing embers are made using Humbrol day glow paint.
Hope you like.
Snitchy sends.
First off is some pipeline sections. These are cast from Hirst arts molds and just need some flock/static grass and felting on the base.
Next up is my greenhouse. It is a MDF kit from Warbases and I finished it off with some photo etched plants from GW and 4D. I am pretty happy with it.
Lastly is my campfire. I needed one for my Gypsy campsite and Figured now was a good time to try it out. I used the Ember techniques from the Osprey Masterclass Terrain modeling book. Richard Windrow is the go to source for detailed techniques and if you have not read his books you really should. The fire-pit is just gravel glued to the base and filled on the edges. The fire is small twigs and horsehair and rubber fibers. The glowing embers are made using Humbrol day glow paint.
Hope you like.
Snitchy sends.
Thursday, April 21, 2016
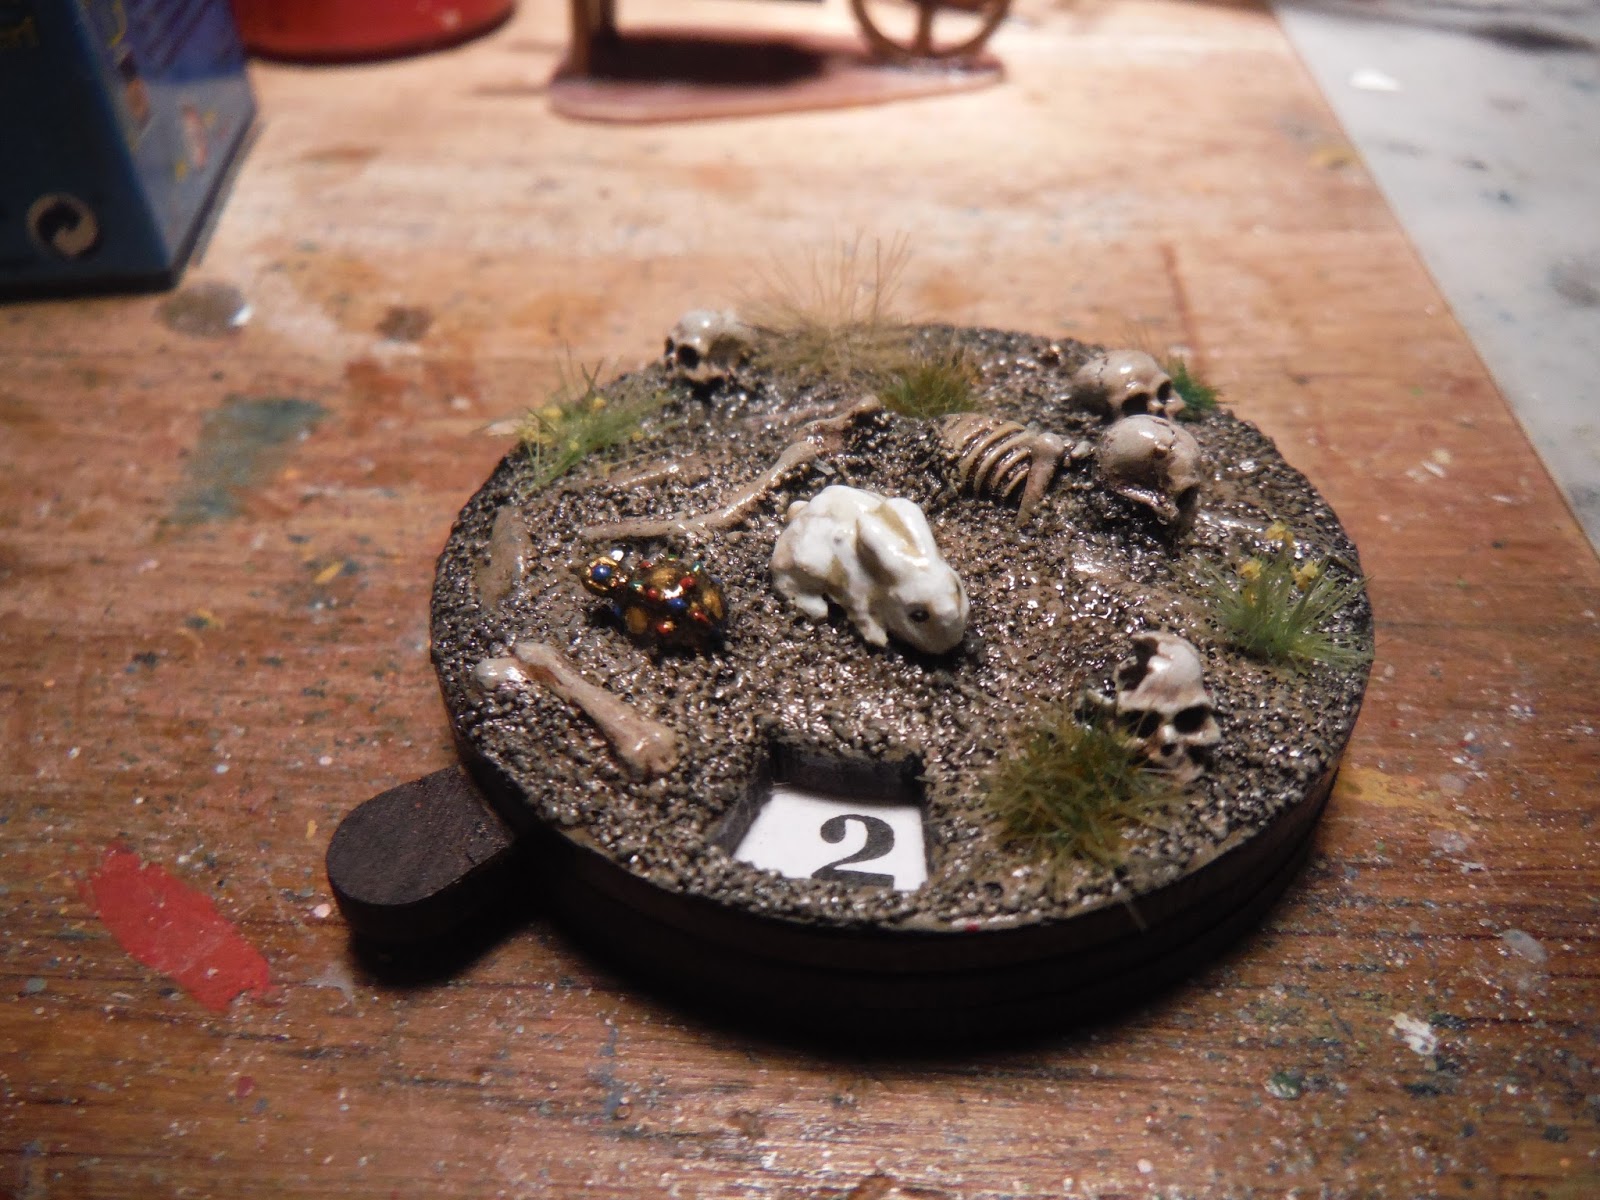
One.... Two.... Five..... No three sir!
I finally got to Salute this year and had a blast. I managed to pick up a few things including this counter. It started life as a Warbases casualty counter and rabbit. The holy hand grenade is from Zing industries. Skulls and bones are from a selection of manufactures. Hope you like.
Snitchy sends.
Snitchy sends.
Subscribe to:
Posts (Atom)