If you are in the UK and have a works nearby check out what they have recently put up.
First is wagon wheels. Here is the pack and a comparison with Sarrisa wagon wheels. There are four of each size so enough for two wagons or some to scatter around.
This is what caught my eye at first. Resin roses. This goes back to a thread on LAF about crops. A few folks have made cabbage fields with roses and I figured I would give it a go. I only bought two pack so it will be a small one.
Lastly is a simple 3/16 inch hand punch. This should work pretty well for panels and such.
Hope that helps.
Snitchy sends.
Total Pageviews
Wednesday, May 4, 2016
Monday, May 2, 2016
Clearing my workbench
I spent this weekend clearing my workbench. Not very much for some
folks who seem to be able to produce massive amounts of stuff, but
pretty good for me since I have about sixteen modeling projects on the
go. Kind of my hobby deficit disorder.
First off is some pipeline sections. These are cast from Hirst arts molds and just need some flock/static grass and felting on the base.
Next up is my greenhouse. It is a MDF kit from Warbases and I finished it off with some photo etched plants from GW and 4D. I am pretty happy with it.
Lastly is my campfire. I needed one for my Gypsy campsite and Figured now was a good time to try it out. I used the Ember techniques from the Osprey Masterclass Terrain modeling book. Richard Windrow is the go to source for detailed techniques and if you have not read his books you really should. The fire-pit is just gravel glued to the base and filled on the edges. The fire is small twigs and horsehair and rubber fibers. The glowing embers are made using Humbrol day glow paint.
Hope you like.
Snitchy sends.
First off is some pipeline sections. These are cast from Hirst arts molds and just need some flock/static grass and felting on the base.
Next up is my greenhouse. It is a MDF kit from Warbases and I finished it off with some photo etched plants from GW and 4D. I am pretty happy with it.
Lastly is my campfire. I needed one for my Gypsy campsite and Figured now was a good time to try it out. I used the Ember techniques from the Osprey Masterclass Terrain modeling book. Richard Windrow is the go to source for detailed techniques and if you have not read his books you really should. The fire-pit is just gravel glued to the base and filled on the edges. The fire is small twigs and horsehair and rubber fibers. The glowing embers are made using Humbrol day glow paint.
Hope you like.
Snitchy sends.
Thursday, April 21, 2016
One.... Two.... Five..... No three sir!
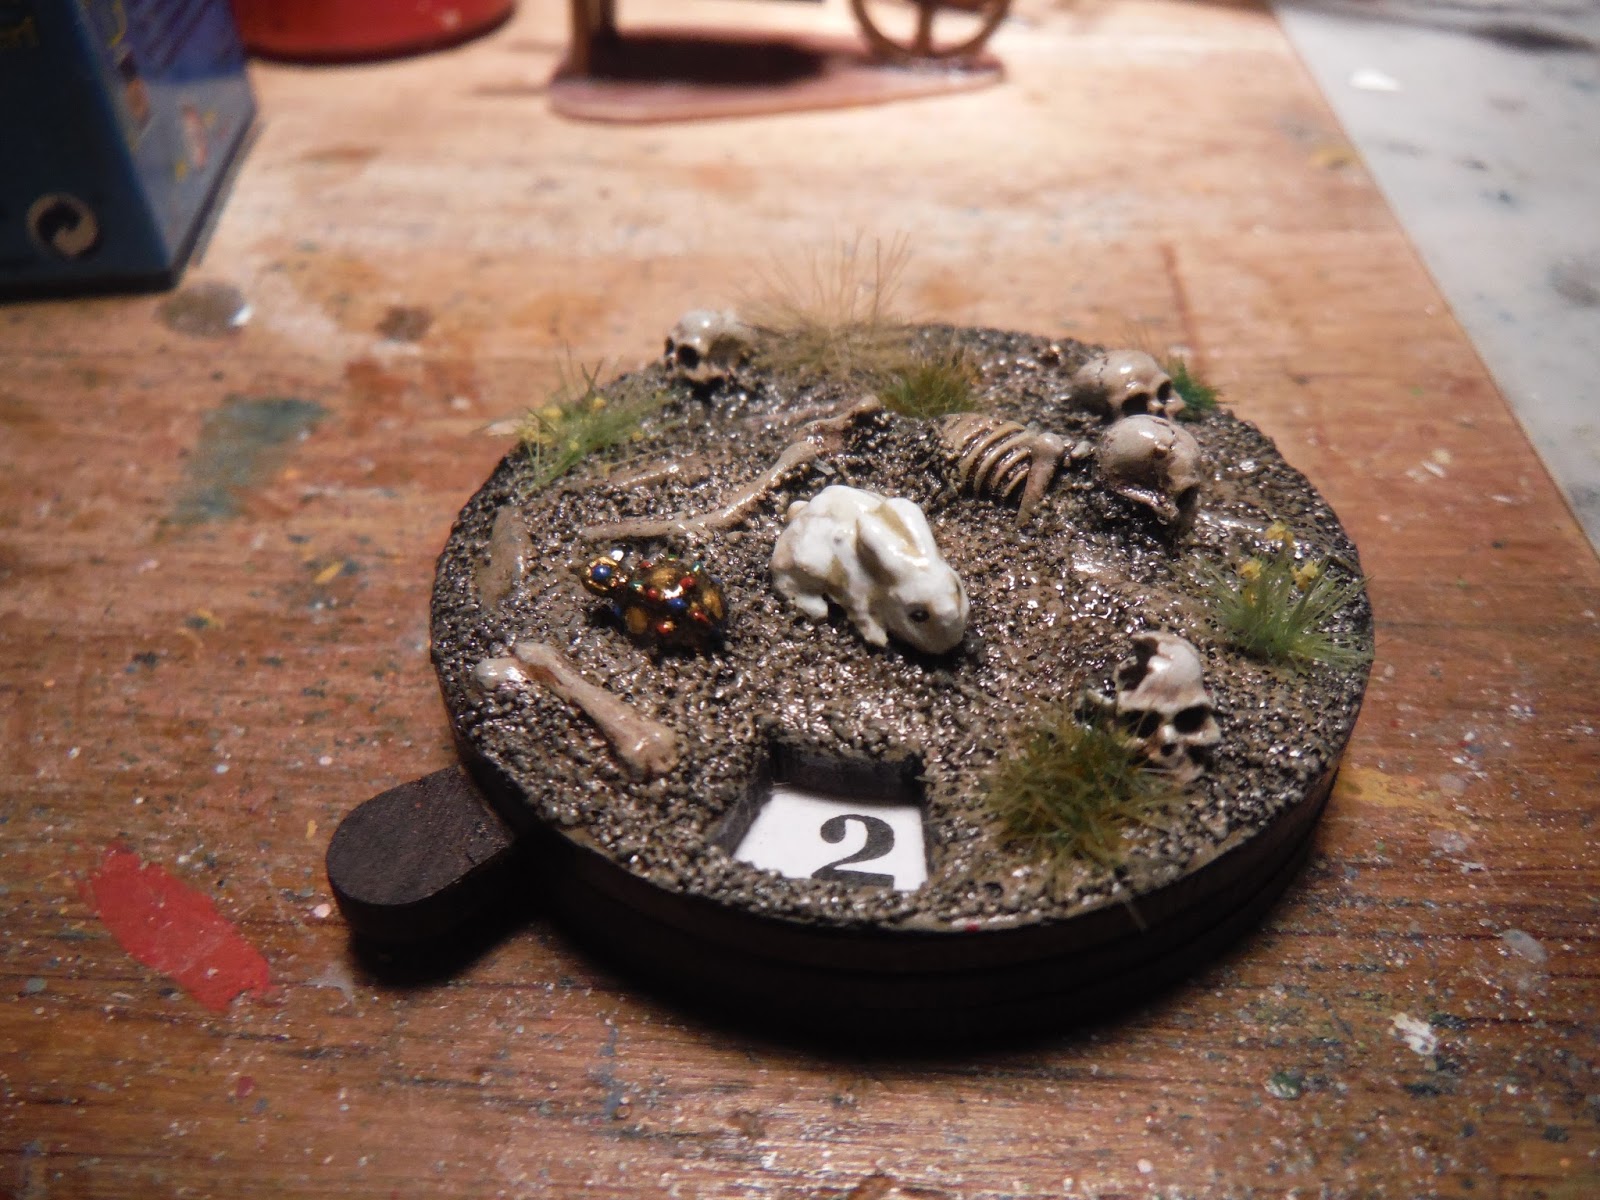
I finally got to Salute this year and had a blast. I managed to pick up a few things including this counter. It started life as a Warbases casualty counter and rabbit. The holy hand grenade is from Zing industries. Skulls and bones are from a selection of manufactures. Hope you like.
Snitchy sends.
Snitchy sends.
Monday, April 11, 2016
Supply dump and pipeline parts.
These are almost complete. I still have to seal, flock and felt the bottom of these pieces. All the components are from the Hirst Arts sci-fy molds, Egyptian brick and pipeline molds. The stacks of crates are glued together in separate stacks so they can be arranged in multiple configurations. The control panels are shamelessly copied from c0d3monk33's control panel design. I have purposefully left the game system ambiguous so they could be used for multiple game systems. They are all painted in acrylics and oil paints.
The crates can be arranged in large piles to replicate hills on the table or they can be arranged in rows to provide tones of cover.
I have enough extra barrels to make several more stacks. They are still on the table and need some work before they are stacked.
Hope you like.
Snitchy sends.
The crates can be arranged in large piles to replicate hills on the table or they can be arranged in rows to provide tones of cover.
I have enough extra barrels to make several more stacks. They are still on the table and need some work before they are stacked.
Hope you like.
Snitchy sends.
Friday, April 1, 2016
Some more terrain.
Just a quick update. I have been working on some terrain lately to replace what I had to sell prior to immigrating. Most of it is not flocked but the basics are there. First a forest template. Using the 4ground forest template base. It was a pretty cost effective way to do my forests. Each insert is a 60mm disk. I picked enough extra disks to replace all the trees with rough terrain markers to change the use for the base. I will post when those are done.
Next is some zig zag or snake fencing. Made with fireplace match sticks. I made four stands of about six inches each.
Then two more products from 4ground. The first is an ox wagon and the second is a cart. I had never made a laser cut kit before. Both of these went together quickly and once based are quite sturdy.
Lastly is a hill. I made is using 1/2 inch foam. The edges were scored to make a short rock face and the top was coated in sand.
Here is a table shot with my rock spires and corn fields.
Hope you like.
Snitchy sends.
Next is some zig zag or snake fencing. Made with fireplace match sticks. I made four stands of about six inches each.
Then two more products from 4ground. The first is an ox wagon and the second is a cart. I had never made a laser cut kit before. Both of these went together quickly and once based are quite sturdy.
Lastly is a hill. I made is using 1/2 inch foam. The edges were scored to make a short rock face and the top was coated in sand.
Here is a table shot with my rock spires and corn fields.
Hope you like.
Snitchy sends.
Wednesday, February 17, 2016
Badlands
Just finished some badlands terrain. I still have enough foam to do another couple
of bases of rocks and some more saguaros.
They break up line of sight pretty well on the table. Hope you like.
Snitchy sends.
Monday, February 8, 2016
Been away for a while.
First of all I need to apologize. Real life has received the lion’s share of my
time recently. Saying that I did manage
to finish a project.
Since I immigrated my gaming options have been limited
because I did not have a Games Workshop army.
I remedied that by creating an Eldar Windrider Host.
So far 40 bikes, 4 vipers, a fire prism, two wave serpents,
a wraith lord, a wraith knight, and a total of 17 infantry. Net effect is the army is incredibly fast and
I tend to either win or loose the game in two turns. Three at a stretch. It did get second in the local GW store for
their armies on parade. There were only
six entries so I don’t think that my limited painting skills was a factor.
Here are some images.
Next the Christmas loot and a couple of reviews.
First off is Bees Putty.
It is a bakable polymer putty similar to Fimo or Sculpy. It is different on several different
levels. First when warm (worked by hand)
it is very similar in texture to plasticine/modeling clay. When it is cool it is almost solid and takes
a bit of effort to blend. While testing
it out I was able to create very thin crisp edges that I would have never been
able to sculpt using Fimo/sculpy. Once
it has been baked it has a similar consistency to set green stuff. It is slightly flexible and difficult to break. It can
be drilled, filed, sawed and glued. It
also sticks to armatures reasonably well.
So far I am very happy with this polymer. The only downside is the price. Compared to fimo/sculpy. It is at least twice
as expensive per 100g. Saying that for detailed use I am more than happy to pay the price. Bees also produces some hand made sculpting tools. I picked up two and they are well made and
very useful.
Next review is for Green Stuff World’s textured
rollers. In a word slick. Easy learning curve, easy to use, good detail
and a reasonable price. I picked up
four and would like to pick up another four later.
Here are some images of the detail and some putty that has been
textured.
RuinsBrick
Cracked ice
Last review is for a product that I picked up on a whim to
see what it was like. Sculpting Block is
a foam that combines the properties of extruded polystyrene (insulation foam)
and floral foam. It is strong like
insulating foam and does not break easily and it can be easily cut filed and
sanded. Its structure consists of many
tiny foam beads and is similar to the green floral foam. It is sold in a package with six blocks of
15X15X2.5 cm. I have included some
photos of a few standing rocks and saguaros that I am working on. I would not have even attempted the saguaros
with insulating foam. These were done
with a simple mini rasp. Another bonus
is it does not react to superglue, model
glue, wood glue, spray paint or spray sealer.
It is a bit expensive at sixteen pounds for a 15 cm cube. Apparently it is not available in the states
yet but I am sure there is another manufacture ready to pick it up.
Hope you like.
Snitchy sends.
Subscribe to:
Posts (Atom)