Total Pageviews

Thursday, August 25, 2011

Easy birds

From Andy Slater at Terragenesis.  I saved it a while ago.  When I went looking it was not on his site so here it is.  Useful little toot.  


Worthwhile tip.
Update.  Found the location of his original file.
Original article

Snitchy sends.

Wednesday, August 17, 2011

Coin Laundry Complete

Here it is. Some action shots first for scale.  Studio, Reaper, Hasselfree and Tengu models. 


Exterior shots


Interior shots
 

Hope you like.
Snitchy sends.

Saturday, July 2, 2011

Coin Laundry WIP

Finally getting off my butt and working on some zombie terrain.  My coin laundry.  Just finished filling the gaps. Did a custom molds for quite few of the small parts.  Building is stripped and embossed foam core. Hope you like.  Will get images of the completed building as soon as I finish.


 Hope you like.
Snitchy sends.

Thursday, April 28, 2011

Modern windows.

I pre-fabricate all of my windows on fantasy builds and I want to do the same for my modern builds.  So here is what I did.  I took three different types of plastic strip and make up my window frame, edging and middle brace.

I used Evergreen strip plastic sizes:
Rectangle 1.5mm X 2.5mm
Rectangle 1.0mm X 2.5mm
Quarter round 1mm

I decided to make two different size window frames for the mold.
1 inch by 1.5 inch
1.5 inch by 2.0 inch

Figure one is the basic cross section of the window frame.  I build a box using the 1.5mm X 2.5mm strip standing up on the short side and a second box inside the first using the same sized styrene lying on its long side.  I then glued 1/4 round around the interior corner of the window.  Figure 2. shows the completed concept window with the middle brace.  The middle brace is made with the 1.0mm X 2.5mm styrene. 

I built both size windows and glued them to a plastic sheet.  I then puttied the corners and edges and I built a mold box around the two windows.

I cast the mold in silicone and let it set for a day.

These are the cast parts.

This is what they look like in a work in progress shot.

Since I frame them in Popsicle sticks, I plan on gluing one window frame looking out, and one looking into the house.  In between these I am planning on putting a sheet of clear plastic from a page protector sheet to simulate the glass.

Hope you like.
Snitchy sends.

Friday, March 25, 2011

Minature woodworking made easy.

I have always found wood structures to fiddly.  You end up gluing your fingers to the wood, and even when complete, the parts usually are pretty weak.  This technique should help you quickly and easily build wood structures.
First draw the structure to scale on graph paper.  
  Then take a clip board and put a sheet of wax paper over the graph paper and clip it in place
Next you mark your first piece of wood to be cut directly off the sketch.
 Cut the wood, and glue it with wood glue to the wax paper.  Let this piece dry since it will anchor all other parts of the construction. 
 Build from one corner out and complete the structure in the direction shown on the image.  Glue each part to the other parts and the wax paper.
 
 When the whole piece is completed, reinforce all joints with a spot of glue.  Give this a few minutes and then dab off the excess with a damp paper towel. 
 Let the glue set for about an hour.  Then carefully peal off the wax paper.
 Sand rear of the part and use a hobby knife to trim any dry puddles of glue that might have attached to the wood. 
  There you have it.  My way of building quick and easy wood structures.
Hope you like.
Snitchy sends.

Monday, March 21, 2011

Wattle and Daub

Wattle and Daub was a staple building technique for many centuries.  A lattice of wicker work was built in between a wood frame, and a mixture of mud, hair, lye and manure was spread on the surface to create the exterior surface of the house.  To recreate this technique, use my Wattle technique to create the wicker insert. I am building out of a piece of foam core and have pre-made the wattle.  
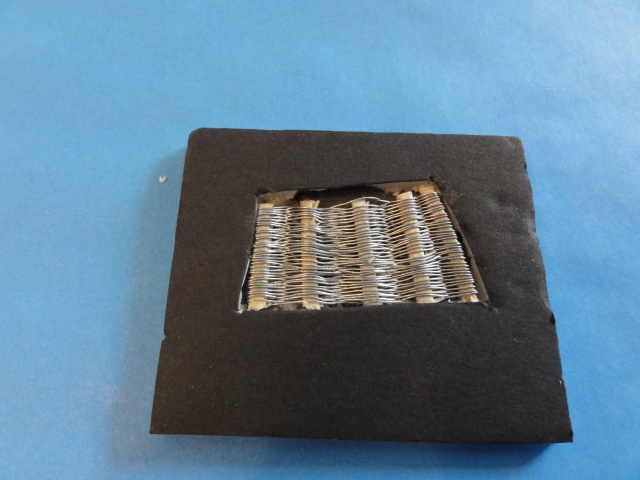
You cut out a window in the foam core that will accept your wattle, remove the foam, and glue the wattle in place.  Do not remove the paper from the backing.
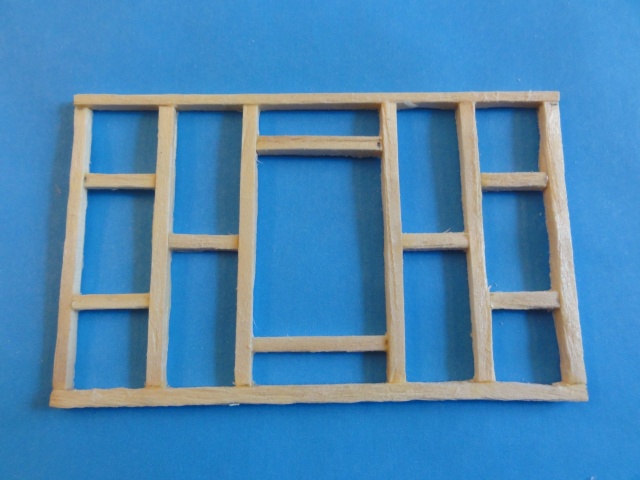
 Add your wood structural supports.  Here mind are done with wood coffee stirrers.
Then I added my surface texture for the wattle and daub.  I used Celluclay (a commercial Paper Mache).  

The completed piece.


Hope that helps.
Snitchy sends.  

How to make wattle.

Here is a quick toot on how to make wattle.  Wattle can be used for fencing, fortifications and was historically used as a building material. 


Drill an odd number of holes into a wood block and glue posts into it.

Start weaving your wire around the posts.  (I used fabric covered floral wire for this one)

Continue to weave the wire through the posts.  Be sure to end a strand at the end of the row.

Once you finish, clip the extra wire from the ends and superglue all points where wire contacts wire and posts. 

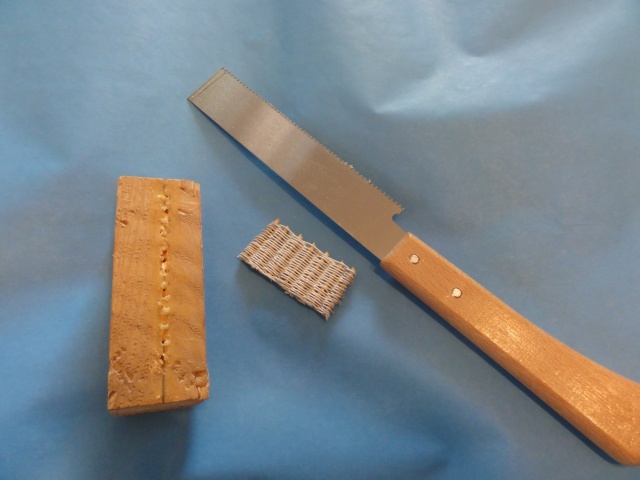
Use a saw to cut the piece of wattle from the base.  
Hope you like.
Snitchy sends.